

Why spend days labouring over individual tiles when you can achieve a professional, textured aesthetic in a single afternoon? You likely want that high-end, spa-inspired atmosphere, but the fear of warping materials or the uncertainty of cutting around pipework often stalls a project. It's a common frustration to choose between the visual warmth of timber and the rigid demands of a wetroom. Using DIY bathroom slat wall panels offers a solution that is durable, waterproof, and mould-resistant.
This guide will help you master the installation process to ensure a finish that is professional, precise, and permanent. We will clarify the technical differences between decorative wood slats and waterproof SPC versions whilst providing clear solutions for complex layouts. From moisture-intelligent preparation to the final seal, you will learn the exact steps needed to transform your bathroom into a modern sanctuary with total confidence.
Key Takeaways
- Identify why moisture-resistant SPC materials are the superior choice for a durable, waterproof, and mould-resistant finish compared to standard timber.
- Master the essential preparation steps for DIY bathroom slat wall panels to ensure a precise, clean, and professional installation.
- Learn the professional 'S-pattern' adhesive technique and spirit-level alignment to achieve a perfectly flush, symmetrical result.
- Navigate complex obstacles like pipework and shower controls with a checklist designed for clean, accurate, and professional-looking cuts.
- Complement your new textured backdrop with curated colour pairings from Scudo bathroom furniture for a cohesive, high-end, and sophisticated aesthetic.
Understanding Bathroom Slat Wall Panels for DIY Upgrades
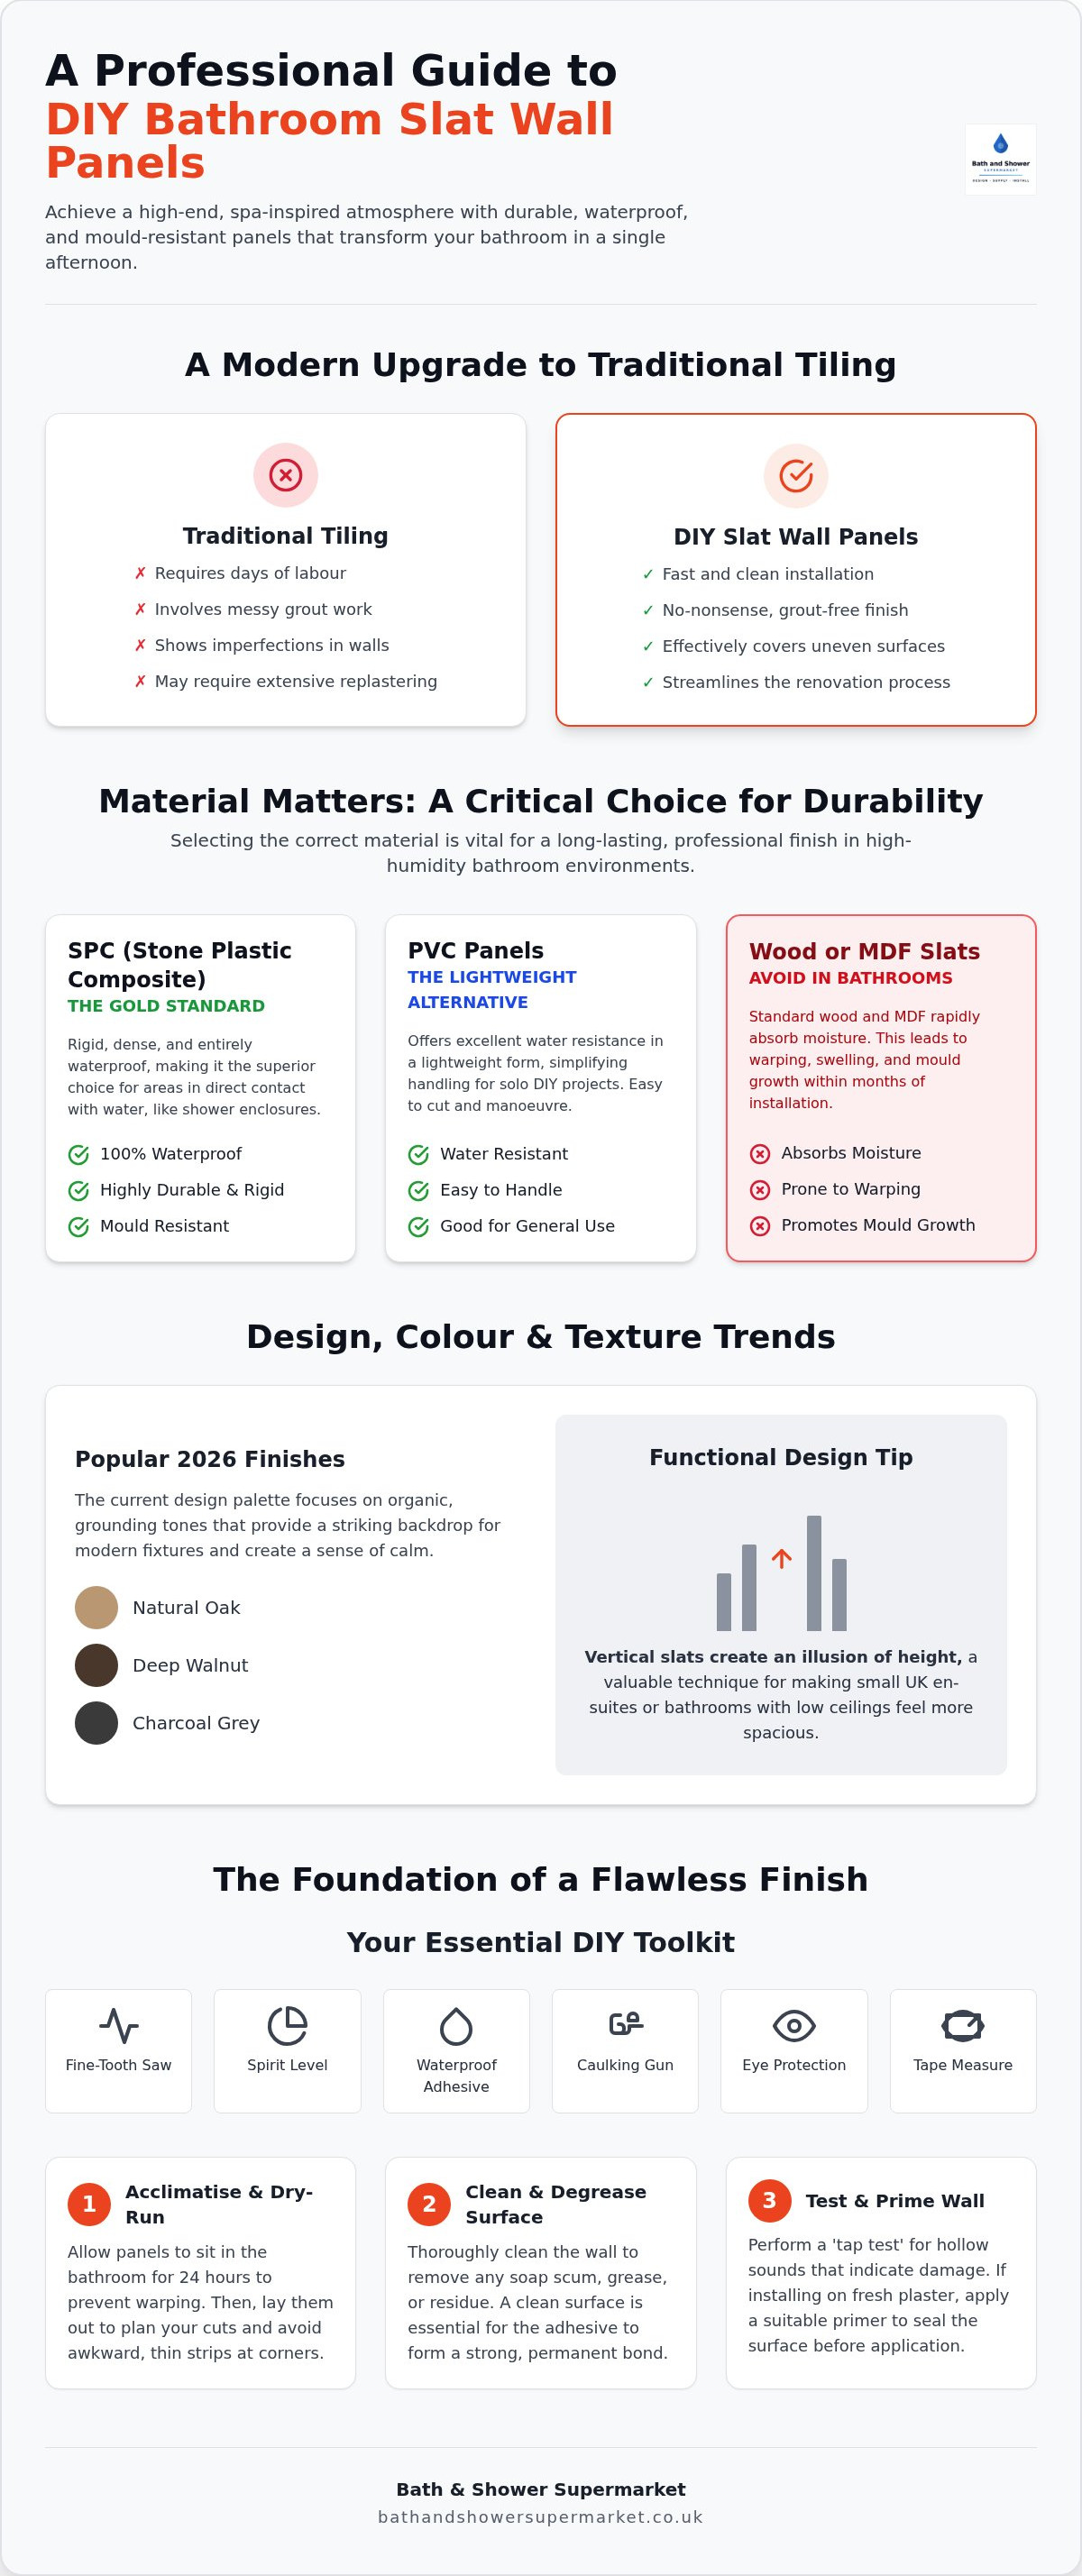
Bathroom slat panels represent a significant shift in modern interior design. They serve as a sophisticated, moisture-resistant alternative to traditional tiling. Whilst the history of wall panelling was once defined by heavy timber and formal rooms, 2026 sees the rise of the 'spa-core' aesthetic in UK homes. This trend prioritises clean lines, natural textures, and a sense of calm. Traditional tiling often involves days of labour, messy grout, and precise spacing. In contrast, DIY bathroom slat wall panels offer a no-nonsense efficiency that streamlines the renovation process. They are fast, clean, and durable. These panels are particularly effective for covering uneven or tired wall surfaces that would otherwise require extensive replastering or preparation.
Material Matters: SPC vs. PVC vs. Treated Wood
Choosing the right material is critical for longevity in high-humidity zones. SPC (Stone Plastic Composite) is the current gold standard for bathroom durability. It's rigid, dense, and entirely waterproof. This makes it ideal for areas in direct contact with water. PVC panels offer a lightweight alternative that simplifies handling for solo DIY projects. They provide excellent water resistance whilst remaining easy to cut and manoeuvre. You must avoid using standard MDF or untreated wood slats. These materials absorb moisture rapidly. This leads to warping, swelling, and mould growth within months. For a professional result, stick to materials engineered for the bathroom environment.
Choosing Your Aesthetic: Colour and Texture Trends
The 2026 design palette focuses on organic, grounding tones. Natural Oak, deep Walnut, and sophisticated Charcoal Grey are the most popular finishes this year. These colours provide a striking backdrop for modern fixtures. Beyond colour, the orientation of the slats plays a functional role in your design. Installing slats vertically creates an immediate illusion of height. This is a valuable technique for small UK en-suites or bathrooms with low ceilings. Modern DIY bathroom slat wall panels also prioritise tactile, 'real-feel' textures. These surfaces mimic the grain of natural timber. They add depth and character without the maintenance requirements of real wood. It's about achieving a high-end look with materials that actually last.
Essential Tools and Preparation for a Professional Finish
Preparation is the non-negotiable foundation of any successful renovation. For DIY bathroom slat wall panels, the difference between a high-end finish and a DIY disaster lies in the details. You must follow the 'triplet' of success: clean walls, correct tools, and precise measurements. This structured approach ensures the installation remains precise, durable, and professional. Before you even open the adhesive, allow your panels to acclimatise to the bathroom's temperature and humidity for at least 24 hours. This prevents future warping or gaps caused by material expansion. A 'dry-run' layout is equally vital. Lay your panels out to ensure you don't end up with awkward, wafer-thin strips at the corners or edges.
The DIY Bathroom Slat Wall Toolkit
Having the right equipment ensures a smooth workflow. Don't rely on general-purpose tools. You need a specific set of items to handle composite materials effectively. A fine-tooth handsaw is essential for clean cuts through SPC or PVC without splintering. You'll also require a spirit level to ensure the first panel is perfectly vertical; everything else depends on this initial alignment. High-tack waterproof adhesive and a quality caulking gun are necessary for even, controlled distribution. Safety gear is a priority. Eye protection is vital because cutting composite materials creates fine dust and sharp shards that can cause injury. Browse our range of professional-grade slatted wall panels to find the perfect match for your project.
Surface Preparation: Ensuring a Strong Bond
Your panels are only as stable as the surface beneath them. Start by cleaning and degreasing existing tiles or plastered walls. Any soap scum, grease, or residue will compromise the adhesive bond. Perform a 'tap test' across the wall. If you hear hollow sounds, the underlying substrate may be failing and requires repair before you proceed. If you're installing onto freshly plastered surfaces, apply a suitable primer first. This seals the porous plaster and ensures the adhesive doesn't dry out too quickly. Proper preparation helps to control moisture in your home by preventing water from seeping behind poorly bonded panels. Ensure the wall is clean, dry, and level before the first panel is fixed in place.
Slatted Wall Panels Installation: The Step-by-Step DIY Method
The success of your installation hinges on the first panel. Never assume your bathroom corners are perfectly plumb. Use a spirit level to draw a precise vertical line on the wall before you begin. This line serves as your master guide. If the first panel is skewed, every subsequent piece will amplify the error. Align the edge of your first panel with this mark to ensure a professional finish. When installing DIY bathroom slat wall panels, precision at the start saves hours of corrective work later. It's a methodical, logical, and rewarding process that defines the quality of the final result.
Adhesive application requires a disciplined approach for maximum surface contact. Apply your high-tack waterproof adhesive in a continuous 'S-pattern' across the back of the panel. This technique ensures even distribution and prevents the formation of weak spots. Most modern panels feature a tongue-and-groove locking mechanism. This system allows panels to click together seamlessly. It creates a watertight barrier that protects your substrate from moisture ingress. If you are working with individual slats rather than full sheets, use a consistent spacer block to maintain uniform gaps throughout the run. This keeps the aesthetic balanced and symmetrical across the entire wall.
Measuring and Cutting for Precision
Adopt the 'measure twice, cut once' rule to avoid wasting expensive materials. Precision is non-negotiable. When you are ready to cut, always mark and cut from the back of the panel. This prevents the decorative surface from splintering or chipping as the saw teeth exit the material. Use a fine-tooth handsaw for a clean, burr-free finish. Hold the saw at a shallow 15-degree angle to the panel surface to achieve a smooth and professional edge without damaging the composite core. This specific angle minimises resistance and ensures the cut remains straight and true.
Adhesive Application and Panel Alignment
High-tack adhesive is the preferred choice over mechanical fixings in waterproof zones. It eliminates the need for screws that could compromise the moisture barrier. Once the panel is in position, apply firm, even pressure across the entire surface. You can use a clean laminate roller or a soft block to ensure no air pockets remain behind the panel. Use plastic spacers at the base of the panels to maintain a consistent expansion gap. This meticulous attention to alignment ensures your DIY bathroom slat wall panels remain straight, secure, and visually perfect for years to come. It is a process defined by patience, logic, and technical care.
Handling Complex Areas: Fixtures, Corners, and Edging
The greatest challenge in any installation involves navigating fixed obstacles. Cutting around pipes, taps, and shower controls is often the primary source of anxiety for those fitting DIY bathroom slat wall panels. However, with a methodical approach, these complex areas become manageable. Precision is paramount. You must ensure every cut is deliberate, accurate, and professional. Using dedicated end caps and 'L' shaped trims provides a clean, industrial, and finished look that hides raw edges. Finalise the project by sealing all boundaries with colour-matched silicone. This step is critical to prevent water ingress and protect the structural integrity of your walls.
Navigating Taps, Pipes, and Vanity Units
Don't attempt to measure complex shapes directly on the panel. Instead, create a paper template to mark out circular cuts for pipework. This simple step ensures a perfect fit every time. For the most integrated aesthetic, we recommend installing your panels behind Scudo bathroom furniture online vanity units. This creates a bespoke, built-in look that avoids awkward gaps around the cabinet edges. When dealing with shower valves, use a hole saw attachment on your drill. It provides a much cleaner entry point than a jigsaw and reduces the risk of surface cracking. You can find the necessary bathroom installation accessories in our dedicated shop to complete your project.
Achieving Seamless Corners and Edges
Corners rarely meet at a perfect 90-degree angle in UK homes. Whilst mitring corners is an option for experienced woodworkers, using professional trim profiles is far more efficient for most. These trims accommodate slight wall variations and provide a robust, waterproof edge. If a wall isn't straight, you'll need to scribe the panel. This involves tracing the wall's contour onto the panel edge and trimming it to fit the specific curve of the masonry. Final sealing is the most important part of the finishing process. Apply anti-fungal silicone amongst the slats where they meet the ceiling, floor, or shower tray. This prevents mould growth and ensures your DIY bathroom slat wall panels remain a hygienic, durable, and long-lasting feature of your home.
Completing the Look with Scudo Bathroom Furniture
A successful installation transforms your space into a cohesive, design-led sanctuary. Your slatted wall serves as the primary feature backdrop for high-quality sanitaryware. It's a foundation that defines the room's character. Because DIY bathroom slat wall panels are a permanent fixture, you must select materials and colours that are built to last. We recommend choosing authorised UK collections to ensure structural integrity, colour consistency, and long-term aesthetic appeal. A professional finish is about more than just the wall; it's about how the entire suite interacts with the new texture. This synergy creates a space that feels deliberate, organised, and sophisticated.
Coordinating Textures and Colours
Design balance is essential when working with strong architectural lines. The 'busy' vertical texture of the slats needs a smooth, minimalist counterpart to avoid overwhelming the visual field. Scudo bathroom furniture provides the perfect contrast with its sleek, unadorned surfaces and precise engineering. For a high-drama aesthetic, pair Charcoal Grey slats with matt black Kartell taps. Integrating wetroom screens UK with a slatted backdrop creates a high-end hotel feel. It's a look that is modern, tactile, and resilient. To further enhance the space, use the Kartell Nero Square LED Black Bathroom Mirror. The integrated lighting highlights the deep vertical shadows created by the slats, adding depth and emphasising the precision of your installation work.
Long-Term Care and Maintenance
Maintaining the professional appearance of your panels requires minimal but consistent effort. For routine cleaning, non-abrasive microfibre cloths are the most effective tool for reaching into the slat grooves without scratching the finish. Avoid harsh chemicals or abrasive scouring pads that can degrade the protective surface layer. You should also inspect the silicone seals amongst the edges and fixtures annually. This simple check ensures the waterproof barrier remains intact and prevents moisture from reaching the underlying substrate. Choosing UV-stable panels ensures your chosen finish remains vibrant and resists colour fading even in bathrooms with direct sunlight. This proactive approach keeps your bathroom looking pristine, hygienic, and professional for years to come. It's about protecting your investment through sensible, logical, and efficient care.
Achieve a Professional Spa-Inspired Finish
Executing a high-end bathroom renovation is entirely possible when you prioritise technical precision over shortcuts. You now understand why SPC materials outperform timber in humid zones and how meticulous preparation ensures a permanent bond. By coordinating DIY bathroom slat wall panels with sleek Scudo furniture, you create a space that is durable, waterproof, and sophisticated. This methodical approach guarantees a result that looks professional whilst remaining remarkably easy to maintain, providing the perfect atmosphere to explore Shamanic Reiki and focus on your holistic well-being.
As an authorised UK retailer, we provide the industrial-grade materials needed to execute this guide with total confidence. You can browse our full range of waterproof slatted wall panels and Scudo furniture at Bath & Shower Supermarket to begin your transformation. Benefit from warehouse-direct prices on Scudo and Kartell, supported by fast national delivery from our dedicated facility. It's time to build the sanctuary you deserve with materials that are engineered to last.
Frequently Asked Questions
Can I install slatted wall panels directly over existing tiles?
Yes, you can install panels over existing tiles provided the surface is structurally sound, clean, and level. Perform a 'tap test' to ensure no tiles are loose before you begin the project. You must degrease the tiles thoroughly to ensure the adhesive creates a permanent bond. This method is a fast, efficient, and clean alternative to the labour-intensive process of removing old masonry.
Are DIY bathroom slat wall panels truly waterproof for use inside a shower?
SPC and PVC slatted panels are entirely waterproof and specifically engineered for high-moisture zones. These materials don't absorb water, swell, or rot like traditional timber or untreated MDF. For DIY bathroom slat wall panels used in shower enclosures, you must seal every joint and edge with anti-fungal silicone. This creates a robust, hygienic, and impenetrable moisture barrier that protects your home's structure.
What is the best adhesive to use for slatted panels in a high-moisture environment?
Use a high-tack, solvent-free, waterproof grab adhesive for the most reliable results. This type of adhesive provides the structural integrity, initial grab, and long-term durability required for bathroom environments. Apply the adhesive in a continuous 'S-pattern' to ensure maximum surface contact across the entire panel. Avoid standard wood glues as they often fail when exposed to constant humidity or temperature fluctuations.
How do I clean the dust and grime out of the grooves between the slats?
A microfibre cloth or a soft-bristled brush is the most effective tool for cleaning slat grooves. These non-abrasive tools remove dust without scratching the protective finish of the composite material. For deeper cleans, use a mild, non-bleach detergent diluted in warm water. Regular maintenance prevents grime buildup and keeps the textured surface looking professional, clean, and sharp amongst your other bathroom fixtures.
Do I need to hire a professional or is slatted wall panels installation truly a DIY job?
DIY bathroom slat wall panels are designed for straightforward installation by homeowners with basic DIY experience. The integrated tongue-and-groove system makes the fitting process logical, fast, and repeatable. Whilst a professional can offer speed, a meticulous individual can achieve the same high-end result by following a spirit level and taking precise measurements. It's a rewarding project that offers professional standards without the need for external contractors.
Can I hang a heavy mirror or cabinet onto the slatted panels once installed?
You can hang heavy items, but you must fix them through the panels and directly into the solid wall substrate. Do not rely on the panel or the adhesive alone to support the weight of a Scudo vanity or a large LED mirror. Use longer screws and appropriate wall plugs to ensure the load is carried by the masonry behind the panels. This ensures your furniture remains safe, secure, and stable for years to come.


