

Most bathroom renovations fail not at the plumbing stage, but in the final finishing touches that define a room's quality. You've likely felt that frustrating wobble or heard the hollow rattle of a poorly secured bath panel. It's a common concern for homeowners who worry that one wrong cut will splinter their new fixture or leave an unsightly gap against an uneven floor. Learning how to fit an acrylic bath panel with professional precision is the key to a bathroom that feels solid, durable, and premium.
Our expert guide provides a clear, step-by-step roadmap to mastering the battening process and achieving a perfectly flush fit against the bath rim. We focus on the technical execution required for Scudo and Kartell reinforced acrylic panels, ensuring a secure, watertight, and professional result every time. Whether you're looking for a technical walkthrough or want to utilise our comprehensive supply and installation service, this article delivers the clarity you need. We'll cover everything from precise trimming techniques to floor-levelling secrets, moving you quickly from a flimsy installation to a robust, high-quality finish.
Key Takeaways
- Master precise measurement techniques to ensure a perfectly flush, watertight finish between the bath rim and floor.
- Discover exactly how to fit an acrylic bath panel using protective masking tape and fine-toothed tools to eliminate the risk of cracking or splintering.
- Learn to construct a robust timber sub-frame that provides a solid, rattle-free foundation for your bathroom furniture.
- Explore the benefits of our professional supply and installation service for a guaranteed, "done-for-you" result using Scudo and Kartell products.
Essential Preparation: Tools and Measuring Your Acrylic Bath Panel
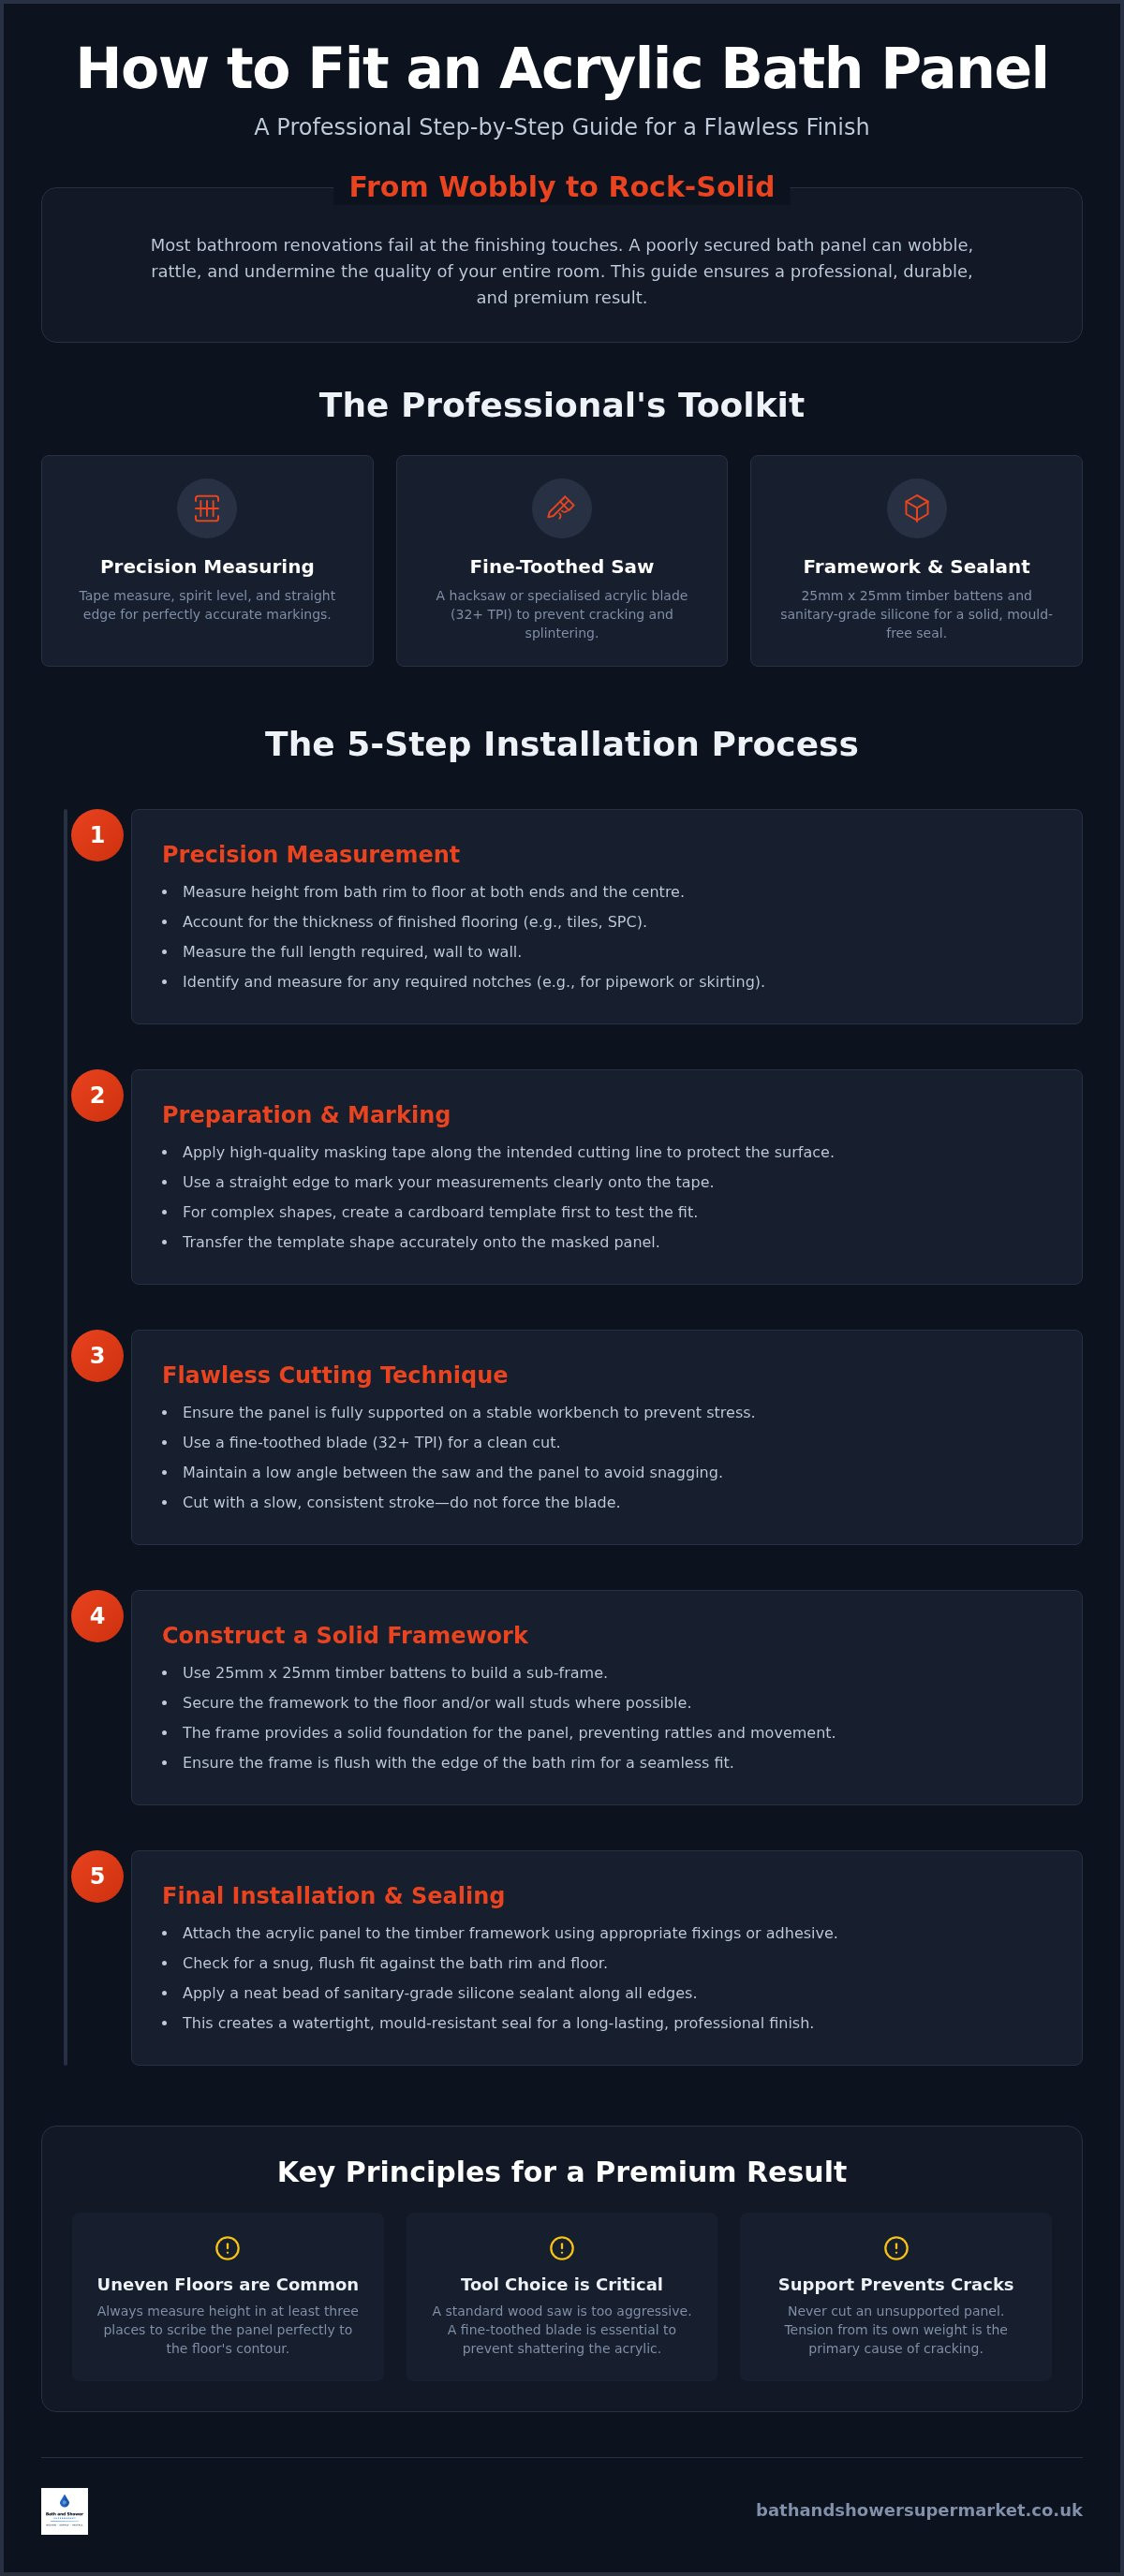
Success in any bathroom project begins with meticulous planning. Before you learn how to fit an acrylic bath panel, you must understand that precision measurement is the difference between a high-end finish and a flimsy, rattling disaster. We recommend gathering your equipment in advance to ensure the installation remains efficient and professional. Our end-to-end service model ensures that when you choose reinforced acrylic panels from Scudo or Kartell, you're backed by technical expertise from the very first measurement.
The Professional Tool Kit for Acrylic Fitting
A standard toolkit won't suffice for a professional-grade result. You'll need a high-quality spirit level to verify that the panel sits perfectly vertical. This prevents the leaning effect common in amateur DIY attempts. For cutting, a fine-toothed hacksaw or a dedicated acrylic blade is essential; standard saws are too aggressive and will likely shatter the material. Your supporting framework requires 25mm x 25mm timber battens. These provide the structural integrity needed to make the panel feel solid, durable, and secure. Finally, ensure you have sanitary-grade silicone sealant. This specific adhesive contains fungicides that prevent mould growth in humid bathroom environments, maintaining a clean and hygienic seal for years.
Accurate Measuring for a Flush Fit
Bathroom floors are rarely level. Measure the vertical distance from the underside of the bath rim to the floor at three separate points: both ends and the centre. If the measurements vary, you'll need to trim the panel to follow the floor's contour. Don't forget to account for the thickness of your floor finish. Whether you're using SPC bathroom flooring or traditional tiles, the panel must sit comfortably on the finished surface. Accurate measurements prevent unsightly gaps and ensure a watertight seal.
Measure the length between the walls accurately. A panel that's even 2mm too long will bow and refuse to click into place. Check for obstructions early. Skirting boards or exposed pipework often require custom notches. Document these dimensions now to avoid mistakes during the cutting phase. If you're managing a complex layout, our comprehensive installation service handles these technical challenges for you, providing a seamless, "done-for-you" solution that guarantees a perfect fit for your home.
Trimming and Shaping: How to Cut Acrylic Without Cracking
Cutting into a high-gloss finish requires more than just a steady hand. It demands a methodical technical approach to prevent the splintering that ruins so many DIY projects. When you are learning how to fit an acrylic bath panel, the cutting phase is where structural integrity is most at risk. We recommend a process that prioritises material safety and aesthetic precision to ensure your bathroom maintains a high-end feel.
Start by applying high-quality masking tape along your intended cutting line. This serves a dual purpose: it protects the delicate surface from scratches caused by the saw's baseplate and provides a high-contrast surface for your pencil marks. Use a straight edge to mark your measurements clearly onto the tape. This ensures your lines are visible and accurate, significantly reducing the chance of a wandering blade or an uneven finish.
The choice of tool is critical for success. Always use a fine-toothed blade with at least 32 teeth per inch (TPI). Whilst cutting, maintain a low angle between the saw and the panel. A steep angle increases the vertical force on the acrylic, which often leads to snagging and stress fractures. Move with a slow, consistent stroke, allowing the blade to do the work rather than forcing it through the material. If you prefer to avoid the technical risk of damaging your new bathroom furniture, our end-to-end installation service offers a guaranteed, "done-for-you" solution that removes all the stress from the process.
Marking Out Notches for Skirting and Pipes
Complex shapes around skirting boards or pipework shouldn't be guessed. Create a cardboard template of the obstruction first. This allows you to test the fit against the wall without risking the acrylic panel. Once the template is perfect, transfer the dimensions to the masked area of the panel. Ensure the panel is fully supported on a stable workbench or trestles during the cut. Unsupported weight creates tension, which is the primary cause of cracking in reinforced acrylic panels from brands like Scudo and Kartell.
Refining the Edge for a Seamless Look
Once the cut is complete, remove the masking tape carefully to inspect your work. Even with a fine blade, the edge may have tiny burrs that prevent a flush fit. Use a fine-grit sandpaper, around 240-grit, or a block plane to smooth the edge. Work in one direction, away from the finished face, to avoid lifting the acrylic layer. Wipe the panel down with a damp cloth to remove all dust before moving to the trial fit. This prevents debris from scratching the bath rim or getting trapped in the sealant later.
Constructing the Framework: Securing Timber Battens for Stability
A sturdy framework is the foundation of a professional installation. Without a robust sub-frame, even high-quality Scudo or Kartell panels will feel flimsy, move when touched, or rattle against the bath rim. Learning how to fit an acrylic bath panel correctly involves more than just adhesive; it requires a structural skeleton that ensures the finish is secure, stable, and silent. This framework provides the essential fixing points that prevent the acrylic from bowing over time.
Positioning the Floor Batten Correctly
Precision is vital when calculating the recess depth for your floor batten. You must account for the thickness of the acrylic panel plus any desired finish depth to ensure the panel sits perfectly flush with the bath rim. Measure and cut your 25mm x 25mm timber battens to fit horizontally along the floor. If you are installing over the best waterproof flooring for bathrooms, such as SPC, ensure you use appropriate fixings that maintain the floor's integrity. For timber floors, use wood screws; for concrete, use high-quality wall plugs. Fix the batten firmly to prevent the panel from kicking out at the bottom during daily use. This creates a permanent, professional-grade anchor point.
Vertical Supports and Corner Joints
Vertical battens provide the lateral stability needed to prevent the panel edges from pulling away from the walls. Fix these supports to the wall at each end of the bath, ensuring they are perfectly vertical using a spirit level. For L-shaped installations, you must construct a dedicated corner post. This timber upright allows you to join the front and end panels securely, creating a seamless and rigid corner. Test the framework rigidity before proceeding. A professional finish requires zero movement in the timber. If the frame flexes, the silicone seal will eventually fail, leading to moisture ingress and potential structural damage.
Our end-to-end service model prioritises this level of technical execution. Whilst many DIY attempts skip the vertical supports, our expert installers treat the framework as the most critical stage of the build. We provide a comprehensive supply and installation service that guarantees a solid, professional-feeling result. This meticulous approach to battening ensures your bathroom furniture remains a durable, high-quality feature of your home for years to come. By choosing a "done-for-you" solution, you eliminate the logistical stress and technical risks associated with complex framework construction.
The Final Installation: Securing the Panel and Waterproof Sealing
Offer the panel up to the bath. Slot the top edge under the bath rim lip. This step is the culmination of your preparation. When learning how to fit an acrylic bath panel, the trial fit is non-negotiable. The panel must sit flush against the timber battens and the wall surfaces at both ends. Any resistance suggests the framework is slightly proud or the floor is uneven. Address these minor adjustments now before applying any permanent fixings. A successful fit should be secure, watertight, and professional.
Fixing Methods: Adhesive vs Screws
Mechanical fixings offer security; adhesives offer aesthetics. For a minimalist, clean look, high-bond professional adhesive is the preferred choice for Scudo and Kartell furniture. However, if you require regular access to the plumbing, magnetic catches provide a clever, invisible solution. If you opt for screws, ensure they are stainless steel or brass. These materials resist corrosion, preventing the orange rust streaks that plague inferior installations. Use colour-matched screw caps to hide the heads, ensuring the finish remains seamless, professional, and refined.
Achieving a Perfect Silicone Seal
A watertight seal requires more than a steady hand. It requires a clean substrate. Use an alcohol-based cleaner to strip all dust and manufacturing oils from the panel and floor. This ensures the sanitary silicone achieves a chemical bond with the surface. A professional secret is to apply the sealant whilst the bath is half-full of water. The weight simulates actual usage, allowing the sealant to cure in its most stressed position. This prevents the bead from cracking or pulling away when you first use the bath. Use a finishing tool to create a consistent, concave bead that looks clean, industrial, and sharp.
Eliminate the risk of leaks and uneven finishes by choosing our comprehensive supply and installation service for your next bathroom upgrade. We handle the technical details to ensure your installation meets the highest trade standards.
Achieving a Professional Finish with Expert Supply and Installation
Understanding how to fit an acrylic bath panel provides essential insight into the structural requirements of a modern bathroom. However, technical knowledge doesn't always translate to flawless execution when faced with real-world site conditions. Our end-to-end service model bridges this gap. We don't just supply high-quality components; we handle the entire physical setup for you. This "done-for-you" approach ensures that your installation is secure, watertight, and perfectly aligned, regardless of uneven floors or complex plumbing layouts.
Choosing a professional provider means prioritising peace of mind. Our logistical mastery ensures that your products are handled with care from our Morpeth warehouse to your door. We focus on a no-nonsense service that values your time and provides straightforward solutions for home improvement. By integrating supply and technical execution, we deliver a seamless experience that amateur DIY attempts simply cannot replicate.
Why Professional Fitting Beats DIY
DIY projects often encounter unexpected hurdles that lead to material waste. A single slip with a hacksaw can ruin a premium reinforced panel, leading to additional costs and delays. Professional installation eliminates this risk entirely. Our experts use industrial-grade sealants and precision fixing methods that far exceed the performance of standard retail kits. This guarantees a finish that stays solid, durable, and rattle-free for years. If you prefer a guaranteed result without the logistical stress, visit our installation services page for a comprehensive setup quote tailored to your project.
Completing Your Bathroom with Scudo and Kartell
A bath panel is only one element of a cohesive, high-quality design. To achieve a truly professional aesthetic, your panel should coordinate perfectly with your wider fixtures and furniture. You might pair your new installation with a P shaped vs L shaped shower bath to maximise both space and functionality. We are an authorised UK retailer for the full Scudo bathroom furniture range, allowing you to match your panel's finish with vanity units and storage solutions for a unified look.
Reliability. Durability. Precision. These three attributes define our commitment to UK homeowners. We operate as a national specialist, coordinating every detail to ensure your bathroom meets the highest architectural standards. By choosing a single source for both supply and technical execution, you benefit from a streamlined process and a single point of accountability. Trust in our expertise to deliver a bathroom that combines meticulous craftsmanship with everyday functional excellence.
Upgrade Your Bathroom with Professional Precision
Achieving a high-end finish relies on combining high-quality materials with meticulous technical execution. We've explored the necessity of a rigid timber sub-frame and the precision required when trimming reinforced acrylic to avoid splintering. These steps ensure your bathroom remains durable, stylish, and silent. Mastering how to fit an acrylic bath panel is a significant step toward a complete home renovation; however, you don't have to tackle the technical risks alone.
As an authorised UK retailer for Scudo and Kartell, we provide national delivery from our Morpeth warehouse alongside expert technical support. Our end-to-end service model handles everything from logistics to the final silicone seal, providing a seamless "done-for-you" experience. Book your professional bath panel installation today to ensure your project meets the highest trade standards. Your perfect bathroom finish is within reach.
Frequently Asked Questions
Can I cut an acrylic bath panel to size?
Yes, acrylic panels are specifically designed for customisation to fit your unique bathroom dimensions. Use a fine-toothed hacksaw or a dedicated acrylic blade to ensure a clean, sharp, professional cut. Always apply masking tape along the cutting line first to prevent the surface from splintering or scratching. This protection is vital for maintaining the high-gloss finish of Scudo and Kartell products during the trimming process.
What is the best way to fix a bath panel without screws?
Magnetic catches represent the most efficient method for a screw-free finish whilst maintaining essential access to plumbing. Alternatively, use a high-bond sanitary-grade adhesive to secure the panel directly to your timber framework. This creates a minimalist, seamless, modern look without visible fixings. If you choose adhesive, ensure the sub-frame is perfectly aligned as adjustments are difficult once the chemical bond cures.
How do I stop my bath panel from rattling or moving?
Movement is usually caused by an inadequate or missing sub-frame. To eliminate rattles, you must construct a robust framework using 25mm x 25mm timber battens secured to the floor and walls. This provides a solid, durable, immovable foundation for the panel. Understanding how to fit an acrylic bath panel involves ensuring it is tightly slotted under the bath rim lip to add necessary tension and prevent vibration.
Should I seal the bottom of the bath panel to the floor?
Yes, applying a neat bead of sanitary silicone sealant along the floor joint is essential for a watertight finish. This prevents water from seeping under the bath, which could damage your timber sub-frame or flooring. A professional seal also helps to anchor the panel in place, contributing to a solid, durable feel. Use a finishing tool to ensure the bead is consistent, concave, and aesthetically sharp.
How do I fit a bath panel if the floor is uneven?
You must scribe the panel to match the floor's contour. Measure the height at multiple points and transfer these dimensions to the panel using masking tape. Carefully trim the bottom edge to follow the slope or irregularities of your bathroom floor. Learning how to fit an acrylic bath panel on uneven surfaces requires patience and precise measurements to avoid unsightly gaps or a tilted appearance.
Can I fit an acrylic bath panel to a P-shaped shower bath?
Yes, but you must select a specific curved panel designed for the radius of your shower bath. These panels are often reinforced to maintain their shape and require more complex battening to support the curve. Our supply and installation service handles these technical challenges, ensuring the panel follows the bath's profile perfectly for a secure, flush, integrated finish that matches your Scudo furniture.
What is a plinth and do I need one for my bath panel?
A plinth is a separate, adjustable base section that sits behind the main panel to fill the gap between the panel and the floor. It is particularly useful if your bath is installed higher than standard. Whilst not always necessary, a plinth allows for greater height flexibility and can hide uneven floor cuts, providing a more forgiving, professional, and refined aesthetic for your bathroom.
How do I remove an old bath panel without damaging the bath?
Start by carefully cutting through any existing silicone sealant using a sharp utility knife, taking care not to scratch the bath rim. Check for hidden screws behind plastic caps or magnetic catches. Gently pull the bottom of the panel away from the battens first. If the panel is stubborn, check for adhesive bonds. Removing the panel slowly prevents stress on the bath's structural support.


